To program the CX-10 with CMSIS and STM32 Hardware Abstraction Layer (HAL), the same hardware preparations are required.
Installing Eclipse and GNU ARM development extension
Follow the steps from this link: http://gnuarmeclipse.livius.net/blog/plugins-install/
Create a new project for CX-10 development
Go to “File->New->C Project”. Choose STM32F0xx C/C++ Project, enter a project name and click next. In this next dialog, select the following settings:

In the next dialogs, it is important to set the Toolchain path to the bin directory of your toolchain. See also http://gnuarmeclipse.livius.net/blog/toolchain-path/.
LED configuration
For this example, we are only going to control the LED, so you will need external power on de VDD pin of the SWD. If you don’t want that, you need to put pin A5 high as well, since it enables the LDO.
Open Includes/BlinkLed.h and modify the LED port and pin. The blue LEDs are at pin B2, so we modify the code as follows:
// Port numbers: 0=A, 1=B, 2=C, 3=D, 4=E, 5=F, 6=G, ...
#define BLINK_PORT_NUMBER               (1)
#define BLINK_PIN_NUMBER                (2)
#define BLINK_ACTIVE_LOW                (0)
Now you should be able to build the project!
Debug configuration
When the project was build successfully, select the .elf file in the project explorer (can be found in the Debug directory). Then, go to “Run->Debug Configurations”. Double click “GDB OpenOCD Debugging”. It should have automatically entered the name of the .elf file in the Application field.
In the Debugger tab, set the Config options to:
-f interface/stlink-v2.cfg -f target/stm32f0x.cfg
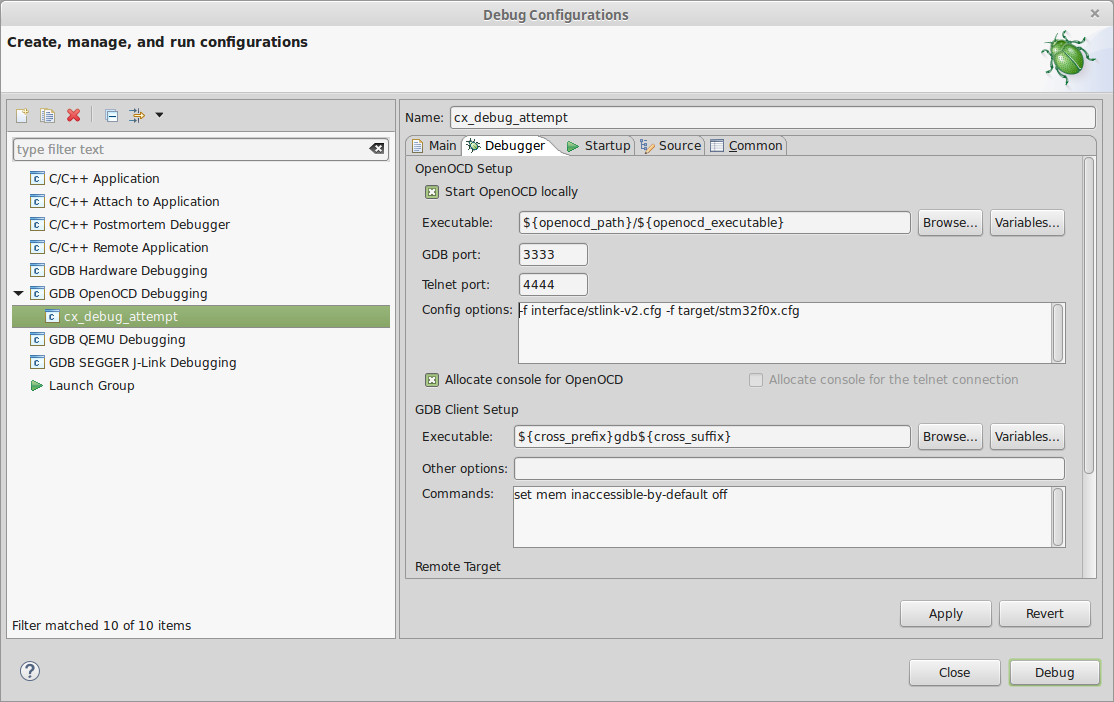
Then, press Debug in the bottom right corner and you should be in debug mode! You should see some printf statements in the console:
Hello ARM World!
System clock: 8000000Hz
Second 1
Second 2
...
Release configuration
Once you are done debugging, you want to flash the image to the chip. Go to “Run->External Tools->External Tools Configurations”. Add a configuration and set it as follows (change the name of the .elf file to your own):
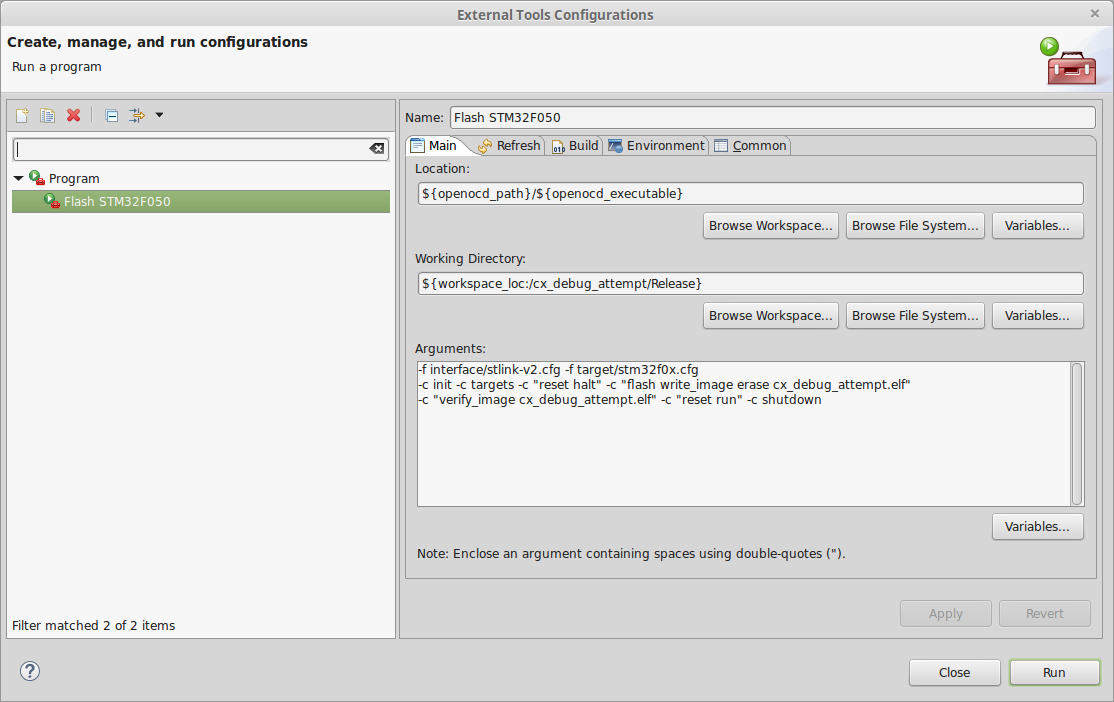
Location:
${openocd_path}/${openocd_executable}
Working Directory:
${workspace_loc:/cx_debug_attempt/Release}
Arguments:
-f interface/stlink-v2.cfg -f target/stm32f0x.cfg
-c init -c targets -c "reset halt" -c "flash write_image erase cx_debug_attempt.elf"
-c "verify_image cx_debug_attempt.elf" -c "reset run" -c shutdown
Now, if you press Run, the CX-10 is flashed with the application!
Awesome!